With the new RepCheckup DirectResponse feature, responding to reviews is now easier than ever. Seriously, you don’t even have to leave your RepCheckup tab anymore with this new integration.
Now, you can integrate your organization’s Google, Facebook, and CareDash profiles with RepCheckup to manage your reviews more easily. We’re always working to make things easier for our users, and DirectResponse was designed to save even more of your valuable time when you use our software.
As you’re taking a look at new and old reviews from your Review Management tab, you’ll now be able to reply to reviews! The ability to edit prior responses is also automatically built in with these integrations.
Here’s how you can set up DirectResponse on your RepCheckup profile.
Integrating Google, Facebook, and CareDash with RepCheckup
To easily respond to your online reviews, follow these simple steps to set up the connection.
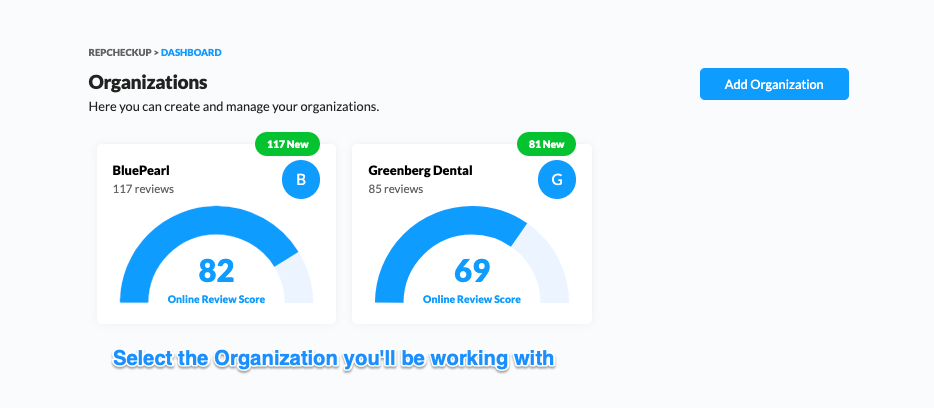
Step 1: Select the right Organization
First, select the Organization that you want to set up DirectResponse on.
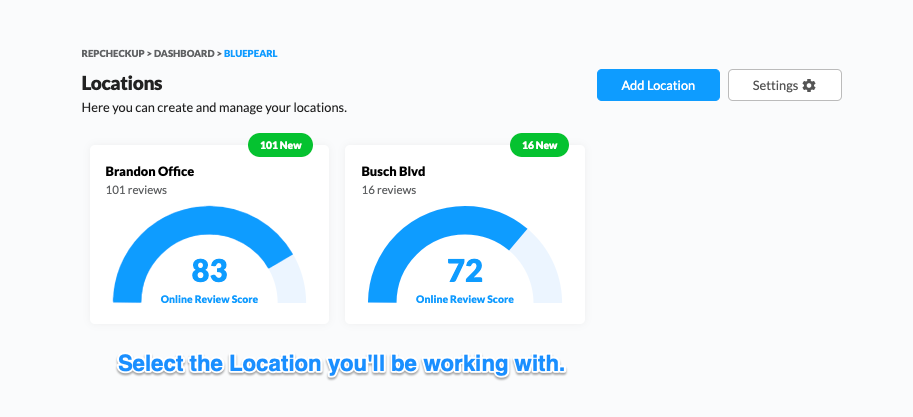
Step 2: Select the right Location
If you are managing more than one location per organization, select the right location so that you can connect your Google, Facebook, or CareDash account to.
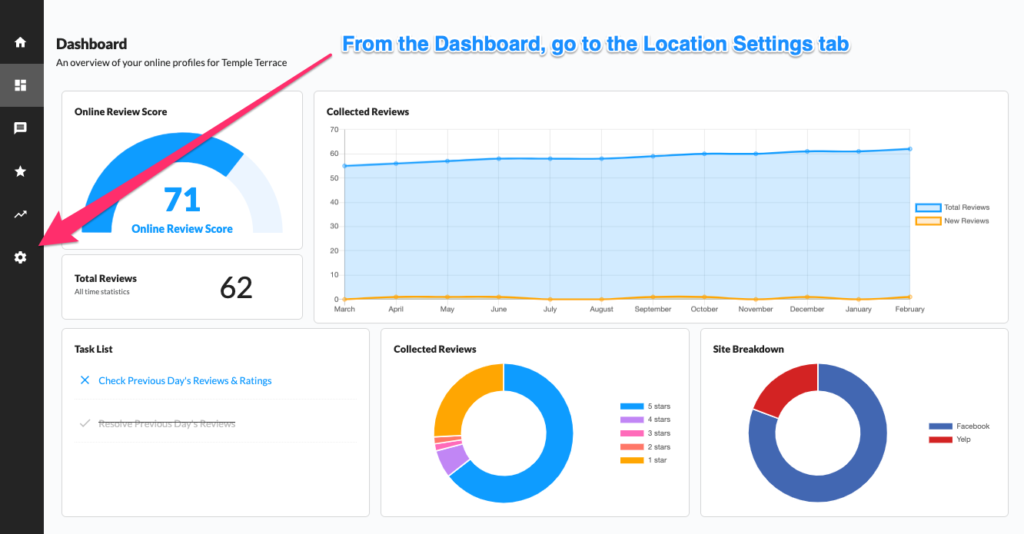
Step 3: Open the Settings tab
Now, you will be on the location’s Dashboard. From this screen, navigate to the Settings tab. The gear icon for Settings can be found at the very bottom of the left sidebar.
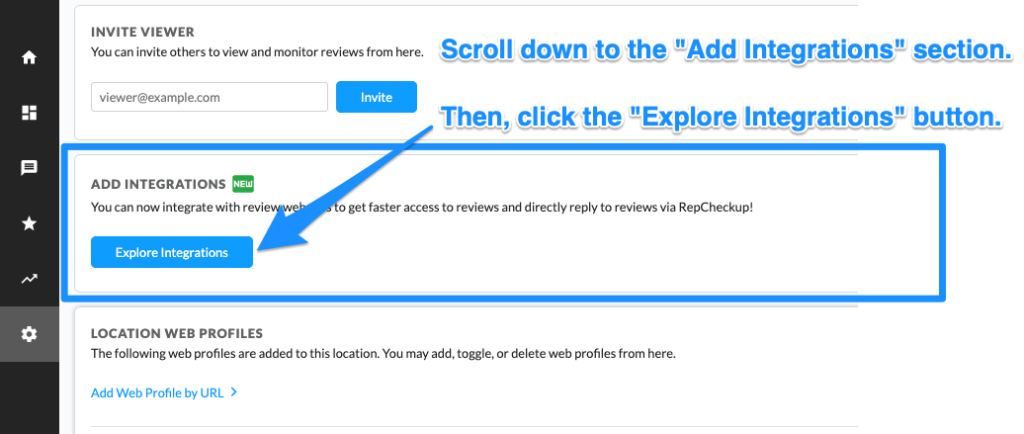
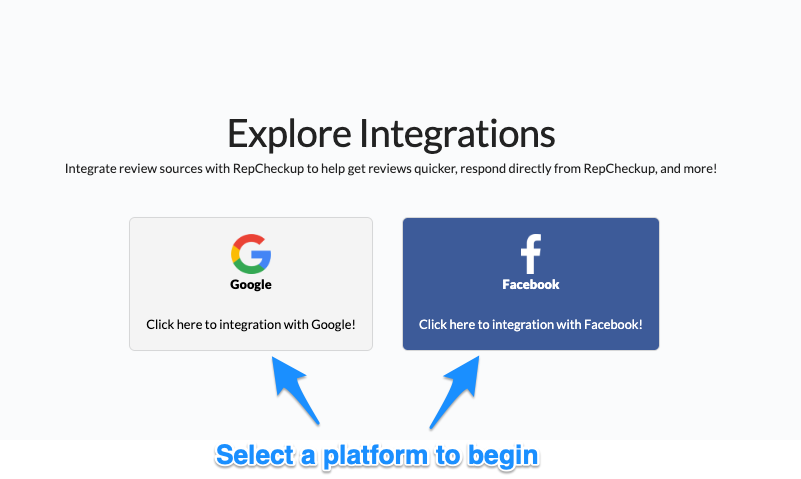
Step 4: Explore Integrations
Once you arrive on the Settings page, scroll down to the Add Integrations section of the page. To start the process of connecting your accounts, just click the “Explore Integrations” button.
Step 5:
On the following screen, you will have the option to select between your Google, Facebook, and CareDash account.
If you want to connect all of these accounts, great! Once you’re done with the first profile, just go through the log-in process for the other profiles.
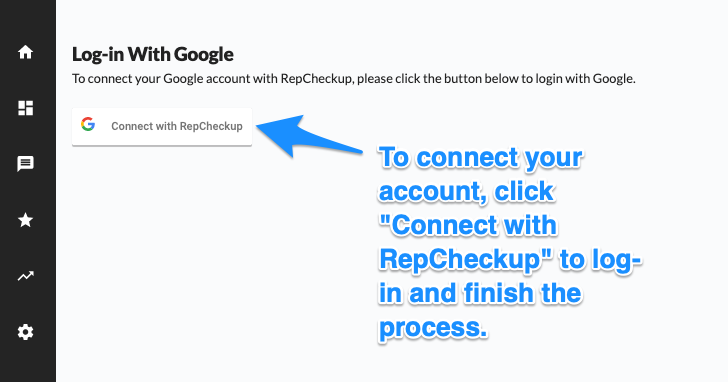
Step 6: Click to Connect
Once you’ve selected which profile you’d like to connect to RepCheckup, click the “Connect to RepCheckup” button to confirm that you want to integrate the profile.
Once you click this button, a pop-up will appear asking you to log into your Google, Facebook, or CareDash profile. Enter your information then go ahead and log in!
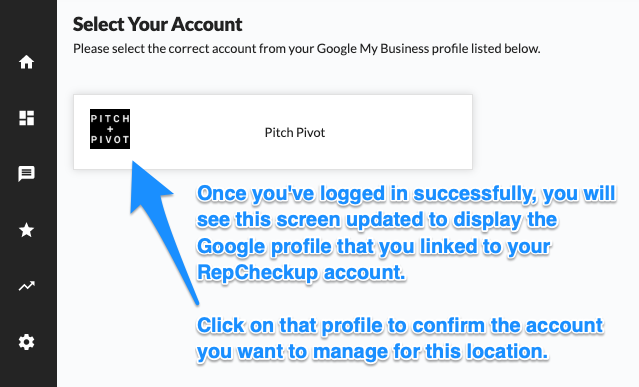
Step 7: Confirm Account
Once you log in with your Google, Facebook, or CareDash account, the page will reload. Now, you should see that account.
Confirm that you’ve connected the right account for this RepCheckup Location, and then click that button.
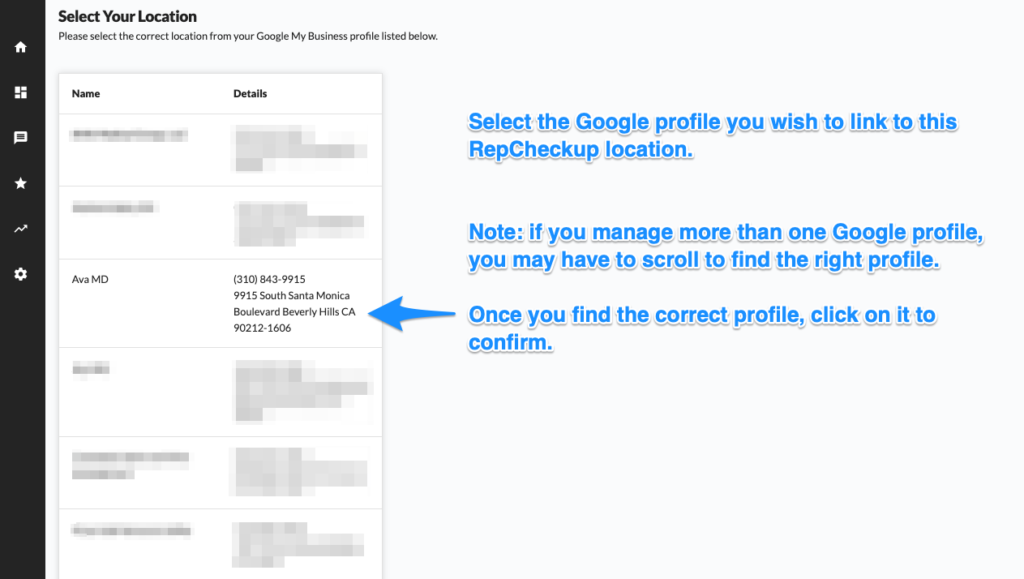
Step 8: Match the Location
If you manage more than one location from your Facebook, Google, or CareDash account, go ahead and select the one that matches this RepCheckup location.
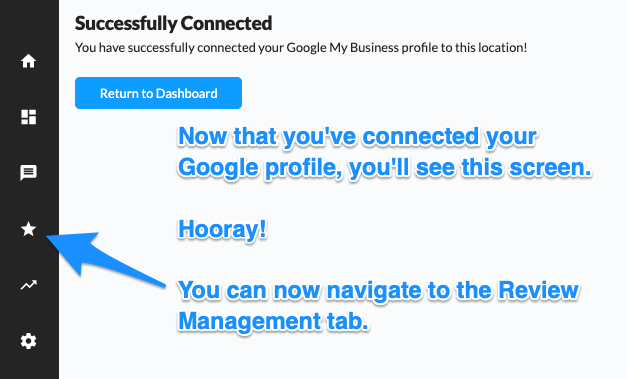
Step 9: Navigate to Review Management
After you select the right location, you’ll see a “Successfully Connected” notification.
At this point, go ahead and click the star icon in the left sidebar to go to the “Review Management” page.
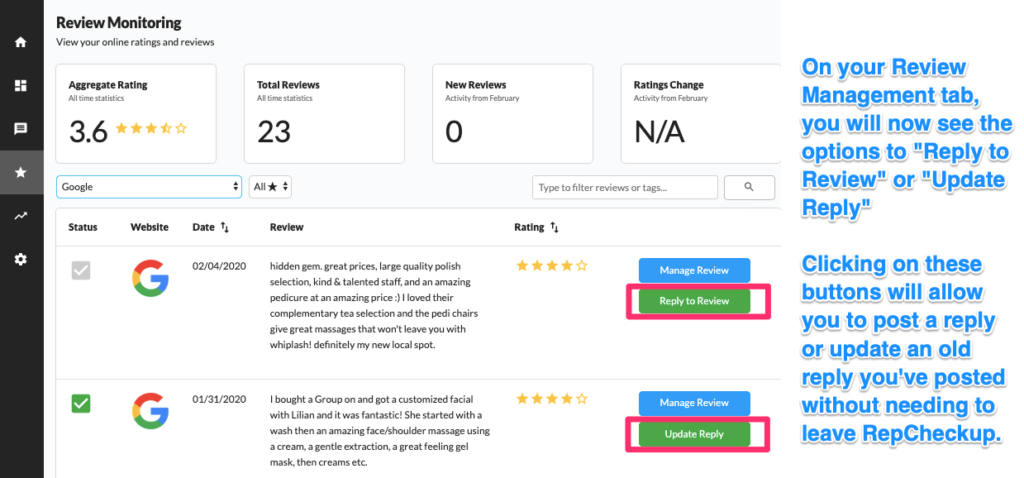
Step 10: Reply to Reviews
Now that you’ve integrated your Google, Facebook, or CareDash profile to RepCheckup, your Review Management page will look a little different.
You’ll now see new green buttons that let you reply to and edit review replies.
If you haven’t responded to the review yet, click the “Reply to Review” button. If you want to edit a previous response that you posted, just click the “Edit Reply” button.
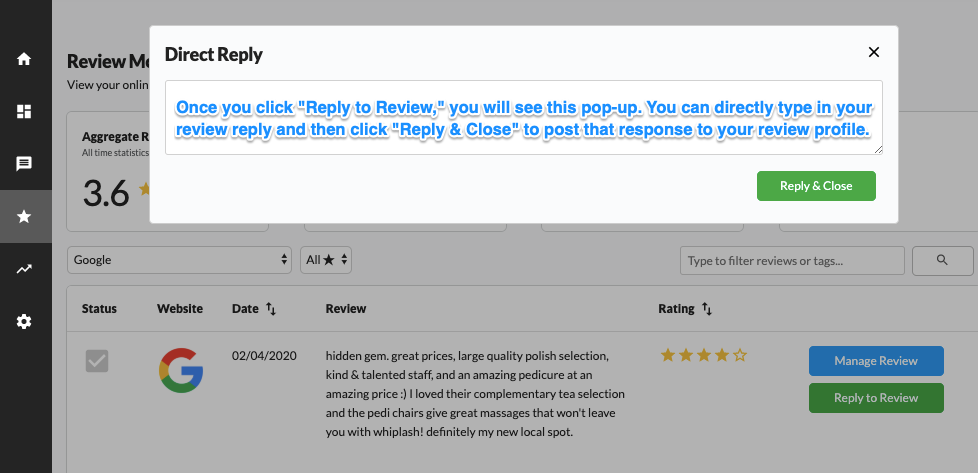
Step 11: Reply to Reviews
If you want to reply to a review, all you’ll need to do is click the “Reply to Review” button.
A pop-up will appear and you will be able to type your response into the text field. Once you’re done, click “Reply & Close” to post the response.
And that’s all it takes! The response that you posted from the RepCheckup tab will automatically appear on your Google, Facebook, or CareDash profile as if you had logged into that platform and replied the “old school” way.
Step 12:
If you want to edit a response that you’ve previously posted, you can do that just as easily as responding to a new review.
Just click “Update Reply” and a new pop-up will appear on your screen. You’ll automatically see your previous response in the text field.
To edit it, just clear the previous response and type in the new response you’d like to post.
Once you’re done, click “Edit Reply & Close” to publish the update.
Alternatively, you could also delete a previous response by clicking “Delete Response,” which is the red button on this pop-up.

And with those simple steps, you’ve successfully integrated your RepCheckup account with your Facebook, Google, or CareDash profiles!